A real birthday cake — not a consolation cake. Here’s how to make one that people actually want a second slice of.
The Problem with Most Gluten-Free Birthday Cakes
Anyone who has eaten a lot of gluten-free baked goods knows the pattern. The texture is off — gummy in the middle, crumbly at the edges, too dense or oddly dry. The flavor sometimes has a faint aftertaste from whatever flour blend was used. It tastes like something made around a dietary restriction rather than a good cake in its own right.
That’s the standard most people are working against when they search for a gluten-free birthday cake recipe from scratch. And it’s a reasonable frustration. According to the National Institute of Diabetes and Digestive and Kidney Diseases, celiac disease affects roughly 1 in 100 people worldwide, and many more follow a gluten-free diet for other health reasons — meaning more birthdays, more celebrations, and more need for a cake that doesn’t disappoint.
The recipe in this article is built around getting the texture and flavor right first. Everything else — frosting, decoration, layers — comes after that.
Understanding Gluten-Free Flour Before You Start
This is probably the most important section in the article. If you skip it, you’ll likely run into problems mid-bake and not know why.
What Gluten Actually Does in a Cake
Gluten is the protein network that forms when wheat flour mixes with liquid. It gives baked goods structure and elasticity — the ability to hold their shape while also being a little soft and springy. In a cake, gluten development is intentionally kept minimal (unlike bread), but it still provides the framework that holds everything together.
When you remove wheat flour from the equation entirely, you lose that structural protein. Gluten-free flour blends try to compensate for this with a combination of starches and sometimes a binding agent like xanthan gum.
Choosing the Right Flour Blend
For a birthday cake from scratch, you want a gluten-free all-purpose flour blend — not single-ingredient flours like almond flour or coconut flour on their own. Single-ingredient GF flours behave very differently from wheat flour and generally require completely rewritten recipes built specifically around their properties.
A reliable all-purpose GF blend typically contains: a base flour (rice flour, sorghum flour, or millet flour), one or two starches (tapioca starch, potato starch, or arrowroot), and sometimes xanthan gum. Many blends include xanthan gum already. If yours doesn’t, you’ll need to add ¼ teaspoon per cup of flour yourself. Without it, the cake will likely crumble when you cut it.
Check the label of your flour blend before starting. This one step prevents more failed gluten-free cakes than any other piece of advice.
A Note on Weighing vs. Measuring by Cup
Gluten-free flours vary in density considerably more than wheat flour does. A cup of one brand’s GF blend can weigh significantly more or less than another brand’s. For this reason, weighing flour on a kitchen scale gives more consistent results than measuring by volume. The recipe below includes both measurements, but if your cake has been coming out wrong with GF flour in the past, try weighing next time.
The Recipe: Gluten-Free Vanilla Birthday Cake from Scratch
This is a two-layer, 8-inch round cake. It’s a vanilla base — classic, crowd-pleasing, and a good foundation for different frostings. Chocolate variation notes are included at the end.
Ingredients
For the cake layers:
- 2¼ cups (280g) gluten-free all-purpose flour blend (with xanthan gum)
- 1½ teaspoons baking powder
- ½ teaspoon baking soda
- ½ teaspoon fine salt
- ¾ cup (170g) unsalted butter, softened to room temperature
- 1½ cups (300g) granulated sugar
- 3 large eggs, at room temperature
- 2 teaspoons pure vanilla extract
- 1 cup (240ml) full-fat sour cream or plain whole-milk yogurt, at room temperature
- ¼ cup (60ml) whole milk, at room temperature
For the vanilla buttercream frosting:
- 1 cup (225g) unsalted butter, softened
- 3½ cups (420g) powdered sugar, sifted
- 3–4 tablespoons heavy cream or whole milk
- 2 teaspoons pure vanilla extract
- Pinch of salt
Equipment You’ll Need
Two 8-inch round cake pans, parchment paper, a stand mixer or hand mixer, a kitchen scale (recommended), an offset spatula for frosting, and a cooling rack. Nothing unusual — just standard cake equipment.
Step-by-Step Instructions
Step 1: Prepare Your Pans and Oven
Preheat the oven to 350°F (175°C). Grease both cake pans thoroughly with butter or non-stick spray, then line the bottoms with a circle of parchment paper and grease that too. Gluten-free cakes tend to stick more than wheat-based ones, so this step matters more than you might think.
Don’t skip the parchment. Getting a GF cake stuck in the pan after it’s baked is a discouraging way to spend a birthday.
Step 2: Mix the Dry Ingredients
In a medium bowl, whisk together the gluten-free flour blend, baking powder, baking soda, and salt. Set aside. Whisking the dry ingredients separately before adding them to the batter ensures the leavening agents are evenly distributed — this is a small step that makes a real difference in how evenly the cake rises.
Step 3: Cream the Butter and Sugar
In your mixing bowl, beat the softened butter and granulated sugar together on medium-high speed for 3 to 4 minutes. You want it genuinely light and fluffy, not just combined. This step incorporates air into the batter and sets up the texture of the finished cake. Take the full time on this one.
If your butter is too cold, it won’t cream properly. If it’s too warm, it’ll look curdled. Room temperature means you can press a finger into it and it leaves an indent easily.
Step 4: Add the Eggs and Vanilla
Add the eggs one at a time, beating well after each addition. If the mixture looks a bit curdled after adding the eggs, don’t worry — it usually comes together once the flour goes in. Add the vanilla extract and mix until combined.
Step 5: Alternate Adding the Dry Ingredients and Wet Ingredients
With the mixer on low, add the flour mixture in three additions, alternating with the sour cream and milk combined. Start and end with the flour. So: flour, wet, flour, wet, flour. Mix only until just combined after each addition — overbeating gluten-free batter can make it gummy.
The batter will be thicker than a typical wheat cake batter. That’s normal. Don’t add extra liquid to loosen it.
Step 6: Divide and Bake
Divide the batter evenly between the two prepared pans and smooth the tops with a spatula. Bake for 30 to 35 minutes, until a toothpick inserted into the center comes out clean and the tops spring back lightly when touched.
One thing to know about gluten-free cakes: they can look done on top before they’re fully baked through. A toothpick test is more reliable than eyeballing it. If the edges look set but the center is still wobbly, give it another 5 minutes.
Step 7: Cool Completely Before Frosting
This is non-negotiable. Let the cakes cool in the pans for 15 minutes, then turn them out onto a wire rack and let them cool completely — at least an hour, ideally two. Frosting a warm gluten-free cake causes the frosting to slide and the cake to break apart at the layers, and it’s very difficult to recover from.
If you’re making the cake ahead of time, wrap the cooled layers tightly in plastic wrap and refrigerate overnight. Cold layers are actually easier to frost — firmer, less crumbly, and more forgiving if you need to make small repairs.
Making the Vanilla Buttercream
The Basic Method
Beat the softened butter alone for 2 minutes until it’s pale and fluffy. Add the sifted powdered sugar gradually, starting on low speed to prevent a cloud of sugar, then increasing to medium. Add the cream one tablespoon at a time until you reach a spreadable consistency. Add the vanilla and salt, then beat on medium-high for another 2 minutes until light.
The frosting should be smooth, not grainy. If it’s grainy, the butter was likely too cold. If it’s too soft to hold its shape, refrigerate for 15 minutes and beat again.
Adjusting Consistency
For a thicker frosting that holds up better in warm rooms (or if the cake will be sitting out for a few hours), use less cream and more powdered sugar. For a softer, more spread-friendly frosting, add cream a little at a time. A pinch of salt in the frosting is important — it cuts the sweetness and makes the vanilla flavor more prominent.
Assembling the Cake
Leveling the Layers
Gluten-free cakes sometimes dome more than wheat cakes during baking. If the tops are rounded, use a long serrated knife to trim them flat before stacking. Hold the knife parallel to the counter and use a gentle sawing motion. Even layers mean the finished cake won’t tilt.
The Crumb Coat
Spread a thin layer of frosting over the entire cake — top and sides — and refrigerate for 20 to 30 minutes. This “crumb coat” seals in the loose crumbs (which there tend to be more of with GF cakes) so your final layer of frosting goes on cleanly. Skip this step and you’ll often end up with brown crumbs visible through the white frosting.
The Final Frosting Layer
Once the crumb coat is set, apply the remaining frosting with an offset spatula. Work in smooth strokes — a bench scraper dragged around the sides gives a clean, straight edge if you want a more polished look. For a more casual finish, swoops and swirls from a spoon or spatula work just as well.
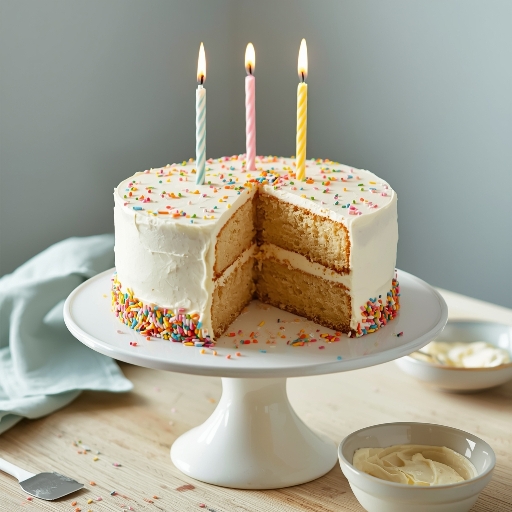
Decorate however suits the occasion. Sprinkles, fresh berries, edible flowers, candles. The cake underneath is the part that matters.
Chocolate Gluten-Free Birthday Cake Variation
The vanilla base recipe adapts easily to chocolate. Make these changes:
- Replace ½ cup (60g) of the GF flour with unsweetened cocoa powder
- Increase the sugar by 2 tablespoons
- Replace the milk with hot coffee (the same amount) — it deepens the chocolate flavor significantly without tasting like coffee
- Add ½ teaspoon espresso powder to the dry ingredients if you have it
Everything else in the recipe stays the same. For the frosting, a chocolate buttercream is straightforward: add ½ cup sifted cocoa powder to the butter before adding the powdered sugar, and increase the cream slightly since cocoa thickens the frosting.
Common Problems and What Causes Them
The Cake Is Dense and Gummy
Almost always a flour issue. Either the flour blend doesn’t contain xanthan gum and none was added, or the batter was overmixed after the flour went in. Mix until just combined once the flour is added — not until smooth, just until combined.
Also check your baking powder. Old baking powder loses its potency and won’t provide enough lift. If yours has been open for more than 6 months, it might be the problem. Test it by dropping a teaspoon into hot water — it should bubble actively.
The Layers Are Fragile and Break When You Turn Them Out
This is common with GF cakes and has two main causes: the pans weren’t greased thoroughly enough, or the cake cooled too long in the pan and the edges contracted and stuck. Fifteen minutes in the pan, then out onto the rack, is the right window.
If a layer breaks, don’t panic. Press it back together, let it cool, and apply the crumb coat. A bit of extra frosting hides a lot. Most people will never know.
The Texture Is Gritty or Sandy
This usually means the flour blend contains too much rice flour and not enough starch, or the cake was underbaked. Some GF flour blends are grittier than others — if you’ve had this problem consistently with one brand, try a different blend.
It Tastes Like “Gluten-Free”
That specific off-flavor — a slight bitterness or aftertaste — is most commonly associated with sorghum flour or certain bean-based flour blends. If your current blend has that flavor, try one built on a rice flour and tapioca starch base, which tends to be more neutral.
Making It Ahead: What Works and What Doesn’t
Gluten-free cakes hold up well when made in stages. The cake layers can be baked 1 to 2 days ahead, wrapped tightly, and refrigerated. The frosting can be made up to 3 days ahead and stored covered in the refrigerator — bring it back to room temperature and rebeat before using.
The fully assembled and frosted cake can be refrigerated for up to 2 days. Take it out of the refrigerator about 30 to 45 minutes before serving — cold cake has a denser texture, and the frosting firms up considerably, so giving it time to come to room temperature makes a noticeable difference.
Freezing works too. Unfrosted layers freeze well for up to a month. Wrap each layer in plastic wrap and then foil, freeze flat, and thaw at room temperature still wrapped (condensation goes on the outside of the wrap, not the cake).
A Few Notes on Baking for Someone with Celiac Disease
If you’re making this cake for someone with diagnosed celiac disease — as opposed to a gluten sensitivity or preference — there are additional steps worth taking. The Celiac Disease Foundation recommends using dedicated gluten-free equipment (mixing bowls, pans, spatulas) that haven’t been used with wheat flour, since cross-contact can cause reactions in sensitive individuals.
That means if your pans have ever been used for wheat flour cakes, they may not be safe for someone with celiac. Parchment paper helps create a barrier, but for someone with a serious diagnosis, using separate equipment is the more reliable approach.
Checking every ingredient label also matters more in this context. Some vanilla extracts, food colorings, and baking sprays contain gluten-containing ingredients or are processed on shared equipment.
The Science of Why GF Cakes Behave Differently
Understanding a bit of the food science helps when things don’t go quite as expected. Food science researchers, including those affiliated with institutions like the Institute of Food Technologists, have studied gluten-free baking extensively and found that the primary challenges are moisture retention, structure without gluten protein, and starch gelatinization during baking.
In practical terms: GF cakes often need more moisture than wheat cakes (which is why sour cream or yogurt works well here — it adds fat and moisture simultaneously), they benefit from an extra egg or slightly more fat to compensate for the missing structural protein, and they can overbake quickly because the starches gelatinize fast. These aren’t just inconveniences — they’re the actual mechanics of why GF cakes behave the way they do.
Once you understand that, you can troubleshoot more effectively when something goes wrong.
Summary: The Difference Between a Good GF Cake and a Great One
The recipe above works because it was built with GF flour in mind from the start — not adapted hastily from a wheat-based recipe. The sour cream adds moisture and tenderness. The ratio of fat to flour compensates for missing gluten structure. The crumb coat step accounts for the extra fragility. The resting time before serving addresses the texture issue that cold refrigeration causes.
None of these steps are complicated. They just require knowing why they’re there.
A gluten-free birthday cake from scratch that actually tastes like a birthday cake — not like a dietary workaround — is completely achievable at home. The first attempt might not be perfect, but the second one almost always is.
See Also – Can I Use Greek Yogurt Instead of Sour Cream in Baking?
See Also – Substitute for Cream of Tartar in Cookies: Every Option Explained